This bread is traditionally baked on January 5th and 6th, conmemorating the 3 Wise Men from the Orient visiting baby Jesus and bringing presents, it goes well with hot cocoa, a warm cup of coffee or even some cold milk.
Ingredients
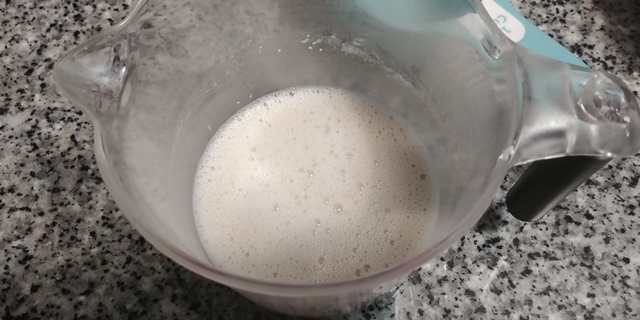
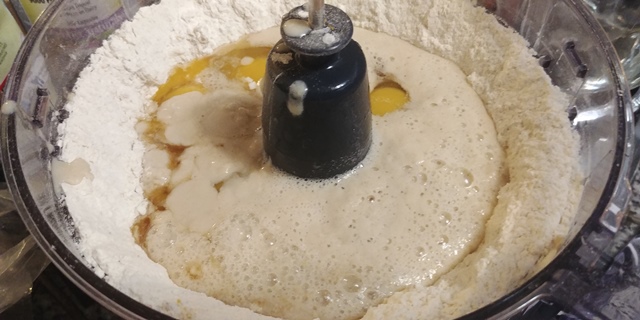
1. Dough Starter: In one small bowl add the following ingredients and stir with a balloon mixer.
Set aside until the yeast forms rises forming foam.
– Yeast 1 tblsp
-1/2 cup warm milk
-1 tblsp sugar
-1 tblsp flour

2. In a big bowl or over your working area, add the following ingredients:
– 4 cups flour
-3/4 cup sugar
-3/4 tsp salt
Add 1 cup of butter and mix by hand or with the bread mixer it until butter integrates with flour, it should have a texture similar to wet sand.

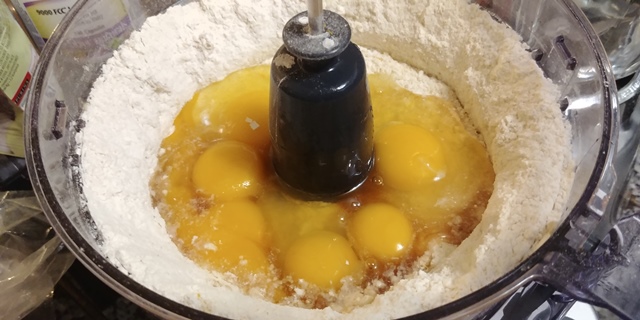
3. Mix the wet ingredients
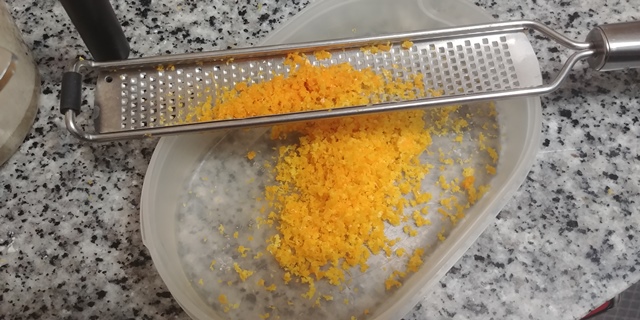
-3 eggs, 3 yolks (set aside whites, these are not required for recipe can be used on other recipes).
– 1 1/2 tblsp vanilla extract
– zest of 2 oranges (avoid grating white part of orange as much as possible because it has a bitter flavour).
– 1 tblsp orange flower extract (this brings some nice perfume to the bread but can be skipped if not found).

4. Integrate the activated yeast foam and wet ingredients to the flour mix. Use a silicon scraper and mix all into a rough, sticky and shaggy dough.


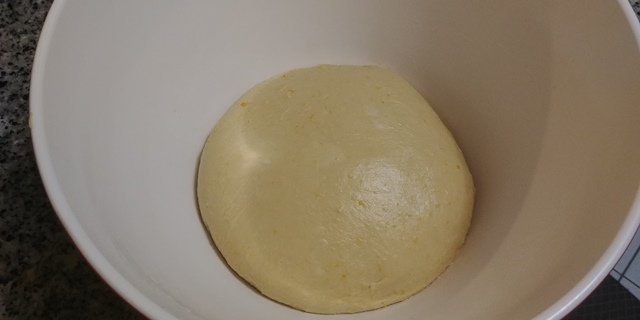
5. Remove dough from mixer or bowl and work it over a lightly floured surface (VERY LIGHTLY), dough will be very sticky and a little hard to manage. Help yourself with some bread scrapers you need to knead it for 15-20 min until dough doesn’t stick to your hands and surface and you can form a soft & smooth surface ball, it must feel still wet and elastic.
Lot’s of elbow grease!
Avoid adding more flour, it can accelerate this process but your bread will turn dry and hard.
As last resource, if dough still feels too sticky after some time kneading it, add a little of vegetable oil to your hands this will help dough on your hands fall off easier and form a dough ball.
6. Clean your bowl and coat the sides with butter or vegetable oil. Place your ball of dough then cover with plastic wrap. Place it on a warm place and let it double it’s size (1-2 hours depending room temperature).
7. For decoration this bread has a pastry crust you might want to prepare while your bread is rising.
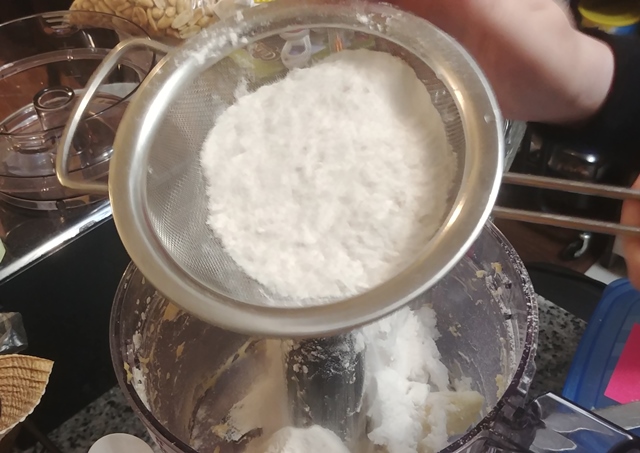
For the crust mix in a bowl:
-1 cup icing sugar
-1 cup butter or vegetable shortening
-1 cup flour
-1/2 tsp vanilla
*Use strainer to add flour and sugar
If you want you can make cocoa flavour crust just add:
2 tsp cocoa


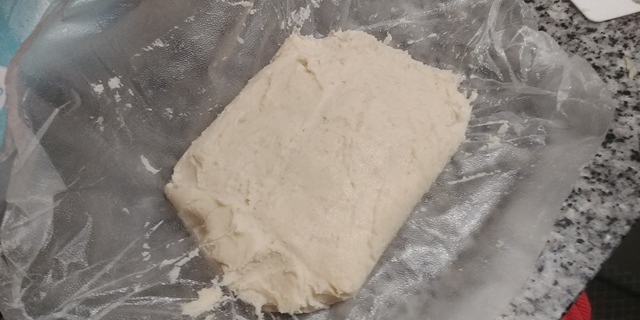
It will create a paste like soft Play Dough,
Place it on the fridge for 20 min.
Form a rectangle and place it between two layers of plastic wrap and spread it on a 1/2 cm layer.
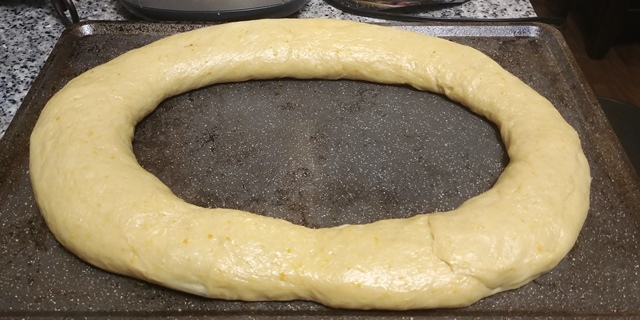
8. When dough has doubled up it’s size after the first resting period. Turn dough out onto a lightly floured surface, and knead a few times.
Roll the dough into a log, pinch dough on cracks to seal them, this will avoid bread loose it’s shape while baking.
Bend the ends to shape a circle (make sure the inner circle isn’t too small, you can use a round cake pan and wrap log around it.
When joining ends pinch dough to remove cracks and brush it with water to help sealing.
9. Transfer to a greased baking pan, and loosely cover with buttered plastic wrap. Let rise in a warm place for 45 minutes or more until almost double in volume.
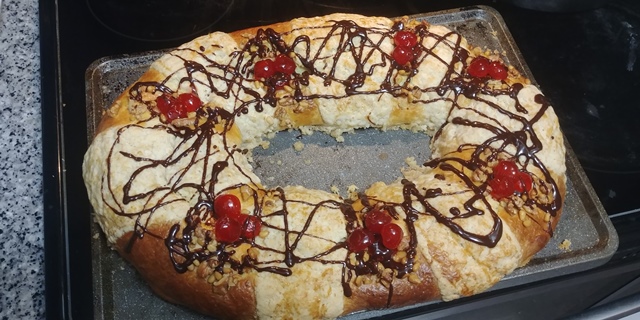
10. Brush the dough with the egg wash two times for a golden crust. Cut rectangles of pastry crust and place it over bread, leave some empty spots for the other toppings:
-Red/Green Glaced Cherries
-Dry fruit Figs/Blueberries/Cranberries/Prunes
-Caramelized orange/lemon peel
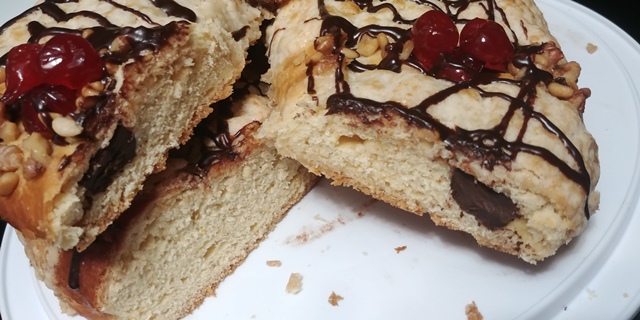
You can add nuts or chocolate but wait until bread comes out and still warm.
11. Bake on preheated oven at 350 degrees farenheit for 20-25 min until bread gets nice golden brown color. Depending on your oven it will require more time, maybe up to 30 minutes.

12. Let bread cool on the pan or transfer to a wire rack. After the bread has cooled insert the plastic baby dolls from the bottom of the bread. (If you can’t find this special dolls ‘safe for baking, you can insert chocolate bars or any other small confectionery item so you can keep tradition, if one of your guests finds one of these they would need to cook a tamales lunch for the whole party.)